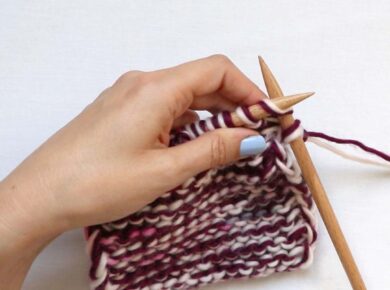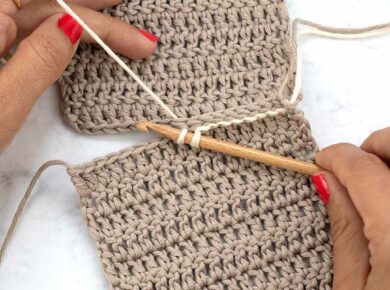
Creating things for ourselves is very satisfying, isn’t it? And if we reuse things, we have laying around the house that were headed for the garbage, even more so. In today’s tutorial we bring you a fun and easy way to convert that cushion that you no longer like into something completely different. Using it as a base and applying one of our petit point kits we are going to make a cover for it and give it a new life.

For this step-by-step tutorial you are going to need:
- Your favorite petit point kit completed
- Cotton fabric for the front of the cushion (we used a yellow fabric)
- Cotton fabric for the back of the cushion (we used a blue fabric)
- Pins
- Tape measure / ruler
- Sewing needles
- Thread in the same color as your fabric (we used a contrasting color so you can see where we made our seams in this tutorial)
- Scissors
- Erasable fabric marker. You can find them at craft stores.
- Paper to make the pattern for the cushion. You can use pattern paper, brown parcel paper, newspaper, etc.
- We also recommend having an iron handy, that you will need for certain steps in the tutorial.

You will also need a cushion or polyfill to stuff your cushion. You can use one that you already have at home and don’t care for, this way you can give a new life to something you already have.
NOTE: Before beginning we recommend wetting your fabrics, especially if they are made of cotton or cotton mix, because the fabric may shrink, and if you want to wash the cushion cover later it may not fit the same. You don’t have to put it through a wash cycle in the washing machine if you don’t want to, it is sufficient to soak the fabric in cold water for 10 minutes and then let it dry.
In this post we explain how to put together the front and back parts of the cushion, but you may only need to make one part, so we have broken down the steps for each section:
- Step 1: Take measurements
- Step 2: Front of the cushion, how to lay out and cut the necessary pieces
- Step 3: Put together
the front of the cushion
- Increase the length of the cushion cover
- Increase the height of the cushion cover
- Step 4: Back of the cushion
Let’s get started!
STEP 1: Take measurements

Using the tape measure, measure the width and length of your finished petit point piece. Just the part that is highlighted with a blue line. For our example, the measurements are: 43 cm long and 28 cm tall.

Now we will also measure the cushion that have. Measure along the seam lines, because it is the flattest part and will give us the real side measurements. In our case the measurements are: 49 cm long and 29 cm tall.
STEP 2
Front of the cushion: how to lay out and cut the necessary pieces
The front is the part that will take the most time, because we need to increase the size of our finished petit point piece.
Before beginning, we are going to draw a small diagram, on paper, of the pieces we will need to put together the front of the cushion and the measurements that it should be.
You will have noticed that our petit point piece measures 43 cm long and our cushion measures 49 cm, we need to increase the length a bit on the sides so it measures the same as the cushion. In the same way, the height is not the same, so we will have to increase the height also.
Ideally, we will add a few centimeters to the sides of the piece so that it is the same as our cushion cover. This way it won’t be too big and we can easily put the cushion inside of the cushion cover.

In the image above we have marked:
The finished height that our cover should be: our cushion measures 29 cm + 2 cm that we add = 31 cm.
The finished length that our cover should be: our cushion measures 49 cm + 2 cm that we add = 51 cm.
At the same time, we also have to calculate the width that the side strips should be: 4 cm on each side. (51 cm long – 43 cm the length of our finished petit point piece = 8 cm / 2 sides = 4 cm).
And the top and bottom strips: 1.5 cm on each side. (31 cm tall – 28 cm the height of our finished petit point piece = 3 cm / 2 sides = 1.5 cm)
Now that we are clear on the dimensions of each part, we are going to make “mini” patterns to cut out all of the pieces needed:

On pattern paper, newspaper, etc., we are going to draw the rectangles we have to cut out. If your paper is not big enough, don’t worry, you can tape several pieces together, and then make your drawing.
Remember to add a margin to each piece to take into account the seams. We recommend adding 2 cm on both sides for seam allowance.

In the image above you can see the drawing of the piece with its measurements (4 x 28 cm) and around it the seam allowance you should add. That’s why our pattern will be: 8 x 32 cm.

Cut out the paper patterns that we drew.
Now we are going continue by cutting out the pieces in our fabric. Before cutting anything, you should iron the fabric well, so that there are no wrinkles or folds. You don’t have to iron all of the fabric, just the area that will be cut out for your pattern is sufficient.

Now we are going to put the pattern onto the fabric to cut out the piece. First, we are going to cut the side pieces: you have to fold the fabric vertically. To find the side you have to fold, look for the selvedge edge, it usually has a different weave or slight color difference.
Pin the pattern to the fabric.

Cut around the piece (you do not have to make any marks on the fabric).

Remove the pins and the pattern. Since we folded the fabric before cutting, we will have two identical pieces. We now have our sides.

Now it is time to make the top and bottom pieces. To do so, fold the fabric horizontally, as shown in the image above. Leaving the selvedge edge on the side folded over itself. Pin the pattern to the fabric and repeat the same as for the previous step.

Now you have the four pieces needed to put together the front of our cushion.
STEP 3
Put together the front of the cushion
- Increase the length of the cushion

The first thing we will do is trim the edges of our piece leaving about 2 cm around the perimeter.

With the right side facing us, place the two side pieces on top as shown in the image above.

Pin the side pieces on the edges.

Using the ruler, draw the margin for the seam allowance. In our example, 2 cm. This is where we will sew our seam.

To secure the fabric better, you can baste the fabric with a contrasting color thread. This way you can make sure that the petit point piece is flush to the edge of the fabric before sewing the seam.

Repeat the same for both sides.

Check that the fabric is flush to our petit point piece. If there are any gaps you have to remove the basting stitches and do it again closer to the edge.

Sew the seam. For this example, we used a contrasting color thread for you to see it better, but you should choose a color the same as the fabric. You can sew the seams be hand or with a sewing machine, which ever you prefer.

Once you have sewn both sides, remove the basting stitches and iron the piece to remove the erasable marker lines.
2. Increase the height of the cushion cover

Now let’s add the top and bottom pieces. Just as we did for the sides: place them on top of the petit point piece and secure them with pins. Repeat the same process as before: mark the seam allowance, baste the pieces in place and make sure they are placed correctly. If they are placed correctly, sew the corresponding seam.

Once you have sewn the seams, remove the basting stitches and lightly iron the seams to remove the erasable marker lines.

Open the pieces that we have sewn to see how the front of the cushion looks.
Lightly iron the whole piece to make sure the seams lay flat.
STEP 4: Back of the cushion cover

We will make another pattern to cut out the piece for the back.
In this case, since we are cutting over folded fabric, the pattern doesn’t have to measure full length, with half it is sufficient.
In our case, the finished measurements are 51 x 31 cm. We shouldn’t forget to add the seam allowance, so our fabric piece should measure: 55 x 35 cm.
Since we are cutting on folded fabric, the measurements of our pattern should be: 27.5 x 35 cm.
In this case, we have to place the pattern right on the fold of the fabric so that the piece does not come out too big or too small.
Remember to iron the fabric before placing the pattern.

Cut the fabric around the pattern.
Remember not to cut the folded edge so that it comes out in one piece.

Remove the pins and flatten out the piece. As you can see you will have the necessary dimension.

With the front part of the cushion cover facing up, place the back piece on top.
So that the right sides of our cushion cover are facing inside.

Pin the two pieces together around the whole edge.

Baste 3 sides of the cover together. This way the pieces are held together better when we sew the seams. Remember to leave one side open to insert the cushion.

Sew the sides that you basted together.
Once you are done, remove the basting stitches and iron the seams to remove the erasable marker lines.

Now, using the iron, we are going to mark the area where we have to make an invisible seam to close our cover: along the line that you drew, make a fold and iron it in place. The line will be erased, but you will have the ironed line to guide you to make the seam.

Turn the cushion cover right side out. You are almost done!
Use a pen to turn the corners all the way out. Bic pen caps are very useful for this 😉

Insert the cushion inside the cover.

Place the edges of the fabric fold on the inside along the marks we made with the iron. If one of the sides does not stay in you can pin it in place.

Close the last side of the cushion little by little using an invisible seam

Once you have finished this last step your cushion is complete!

We hope you enjoyed this tutorial. It’s very relaxing to spend the afternoon sewing and giving new life to old cushions laying around that we don’t like anymore. This way you personalize your home. We look forward to seeing your cushions on social networks, you can share them with us using the hashtag #weareknitters.
